Sunday, April 22, 2018

Fleisch Salat

Fleisch Salat
I thought this was a cool blog idea, which it is, but turns out it will be really short as there isn't a lot you can say about it, other than it's good and you should try it.  Anyway...

Leave it to the Germans to have a "meat salad".  And, I say that with the utmost respect and admiration, I mean, what a great idea.  We ate this frequently during the summer and it always hit the spot, but it was even better the next day,  The concept couldn't be simpler.  Meat (typically deli ham), onion, bell pepper, dill pickle, and a nice vinegar and oil.  Mom like to use Italian dressing.  What?  Italy is fairly close to Germany, so we will go with it.  Basically almost any vinegar and oil dressing can work.  I suppose you could go nuts and add lots of other things into this salad, but I like to stick with what I grew up with.  The only real advice I have is to stay with deli ham and dill pickles the first time you make it.  Then if you like the concept, go crazy and make it with whatever you want.  It is a great lunch or light dinner for a hot day.  Enjoy.

Friday, April 13, 2018

Bialetti Moka Express

Bialetti Moka Express 9 Cup
I had seen the Bialetti Moka Express many times when shopping for coffee accouterments but never gave it much thought.  To be honest, it looked antiquated and kind of cheep at first glance.  It lacked the shine of stainless or the rich glossy finish of enamel.  Yes, we have all succumbed to marketing at one point or another.  But recently I found myself on the market for an espresso machine.  I had a small one for years and don't really remember what happened to it.  I couldn't find it anywhere, so I finally gave up and started looking for a replacement.  Then sticker shock set in and I looked around my kitchen and remembered that I don't have any spare counter space to devote to a unitasker like an espresso machine.  What to do.  Then I noticed the Moka Express sitting there quietly in the list of search results and I clicked on it.  I learned a lot that day.  Mainly, don't dismiss things by how they look, and the Moka Express has an almost cult-like following.  People not only use these things, but they collect them for seemingly no other reason than they are cool.  And they are cool.  I also feel I should mention that the following may seem like I am promoting the product.  I am, but only because it is cool and I want everyone to have happy coffee time whenever they want, not because I am getting anything from anyone, monetarily or otherwise, to do so.  When I find something that I really like, I tend to share it with people that I think would also like it.  I digress.

I didn't realize the history behind the Moka Express.  These things have been around for a long time.  I'm not going to regurgitate it here since you are only a couple clicks away from tons of info on it, but I will say that it is one of the coolest gadgets I have ever owned.  Is it an espresso maker?  Not really.  Is it a coffee maker?  Also, not really.  It is kind of like an espresso maker and a coffee maker got together and had a baby.  It works on the principle of using steam pressure to push water through coffee and makes a rich rocket fuel type of coffee that is neither coffee nor espresso.  That being said, it can be used much in the same way as espresso.

The concept is simple.  Reservoir A is filled with water.  Filter funnel B is filled with coffee.  The funnel B is placed in reservoir A and pot C is screwed onto reservoir A with a gasket sealing the seam where the funnel B and reservoir A meet.  Then heat is applied, the water heats up, pressure builds and pushes the hot water through the bottom of the funnel, up through the coffee, and up further through the riser tube in the pot on top.  The riser tube is hollow and has two holes on either side of the small part on top of the tube, thus stopping coffee from draining back into the reservoir.  So, everything from the bottom to the top of the riser tube is a sealed unit and steam pressure does the work.  In case you are wondering, yes there is a pressure release valve on the reservoir just in case.
Image linked from wikiHow.com
The process is pretty simple and I have summarized it for you here:
  • Fill the reservoir with very hot water up to the bottom of the safety valve.  I have an instant hot water system in my kitchen so the water comes out just under boiling.  The idea is to give it a head start so the grounds don't get too hot during the heating process, which negatively affects the coffee flavor.  Personally, I have used both hot and cold water and didn't notice much, if any difference in flavor.  I mainly use the hot water to move things along so I can be drinking coffee sooner. :-)
  • Fill the filter funnel with coffee that is a bit more course than espresso but finer than a drip grind.  Do not pack it down like you would for espresso, but feel free to level it out with your finger.  The main reason is that you want the water to be able to push through without popping the safety valve.  To be honest, I have tamped it down with a spoon with no ill effects, but again, it was just a gentle tamp, not anywhere near 30 pounds like you would use for espresso.  We are talking mere ounces.
  • Place the funnel into the reservoir, making sure there are no grounds on the lip where the gasket seals.
  • If you used hot water to fill it, remember to use a towel to hold the bottom while you thread the top on, and firmly snug it up.  No need to gorilla tighten it.  You just want the gasket to seal without damaging it.
  • Put it on medium low heat.  Lower heat works best.  It takes some time to dial it in.  In my kitchen, I use my smallest gas burner on medium-low and it is enough to gently push the water through.  Too much heat and it will sputter and the coffee flavor will suffer.  I like to leave the lid up until the coffee starts to flow, then I close it.
  • Once it starts to gently push steam without any gurgling, it is done.  That this point, remove it from the heat and pour cool water on the reservoir using your sink faucet.  This will shut down the process so it isn't steaming all over the place.
  • Serve your coffee.  It is way to strong to drink on its own, for my taste.  I like to put a couple teaspoons of sugar in my cup, with about 3-4 ounces of half and half, then give it a quick froth with my Bodum milk frother until it doubles in volume, then hit it with some rocket fuel.
I started out with a 3 cup Moka and fell in love with it.  While it was fine to make one beverage with, it sucked when you had guests, so I bought the 9 cup.  I may even consider the 12 at some point.  All that said, the 3 cup worked like a charm right out of the box.  First try and I had delicious coffee.  Not the 9 cup.  No matter what I did, it sputtered and never made a full batch.  After doing a bit of searching, I learned that it was not an uncommon problem.  The solutions were don't use so much heat, make sure your gasket is clean, tighten it up more, etc.  I had tried all those.  Then I stopped for a second and thought, "This is a basic steam system.  This concept has been around for hundreds of years.  I should be able to figure this out!"  And, the only reason I bring this up is because if you have tried the basic stuff and still have a problem, this may be the fix.

Let's dissect the concept a bit.  In a good Moka, the water comes in from the bottom of the funnel.  Meaning, there should be mainly water coming up the funnel and maybe a bit of air bubbles from the heating process.  The only way to get the amount of air sputtering that I was getting was if the steam was somehow getting around the filter.  Since the gasket was brand new and looked good under inspection, it had to be coming from the seal between the filter and the reservoir.  Upon closer inspection, bingo, the basket sat too far down into the reservoir.  It appeared as though it hadn't been properly finished.  On my 3 cup unit that worked great, the basket and top of the reservoir were flush at the top.  On my malfunctioning 9 cup until, the lip of the reservoir was sitting higher than the filter. Now, I suppose that if I gorilla tightened it, it would probably have worked, as the higher part of the reservoir would have sunk into the gasket until it met the filter.  But my gasket would have been shredded in a couple of days.  So, I took it to my shop and touched up the top of the reservoir, without the filter, with a random orbit sander with 220 grit paper.  Slowly and carefully, testing the fit of the filter along the way until the top was flush.  I washed the parts up and tried it again.  Success!

I am not sure if I just got a lemon, or if it is a more common problem.  To be fair, the overall quality of the product is very good and this experience has not soured me in any way.  I love my Moka Express and would gladly buy another one.  I get my "espresso" fix and it easily fits in my cupboard for storage so it doesn't take up valuable counter space.  If you are in the boat I was in, wanting espresso, but not wanting to spend the money or give up the counter space, I highly recommend this product.  I think I spent about $45 on the 9 cup unit plus about $9 on the frother.  A far cry from a descent espresso machine.

Sunday, April 1, 2018

Olive Oil Poached Eggs


One of my favorite ways to eat eggs
Greetings egg lovers. For the record, these are not poached as much as they are deep fried on olive oil, but in a similar technique to poached eggs.  I forget where I learned about these, but I think it is Spanish in origin.  To date I have yet to meet anyone who knows about this method for cooking eggs.  Too bad, too, as this is one of my favorite ways because it combines fresh eggs and extra virgin olive oil and a bit of sea salt which leaves you with a very simple but amazing symphony of flavors.  Although good quality market eggs would be good as well, I prefer using fresh farm eggs.  One typically assumes chicken eggs, but I have made these with duck eggs with even better results.  But, duck eggs are really hard to find unless you know someone that raises them.  They are impossible to find in a regular grocery store.

So, let's go over the technique:

  • Place a ramekin in a warm, but not hot, oven.
  • Crack an egg into a small dish.
  • Heat about an inch of extra virgin olive oil in a small sauce pan to almost smoking.
  • Tip the pan up on an edge so that there is a deep well of oil on one side.
  • Gently slide the egg from the dish into the oil.  It will bubble and pop a bit.  BE CAREFUL!
  • Once the egg white is set, which takes a matter of a few seconds, gently remove the egg with a slotted spoon and place it into the warm ramekin.
  • Repeat one or two more times or more if you are hungry.
  • Sprinkle the eggs with some sea salt or kosher salt.
  • Enjoy your fantastic "poached" eggs.
Believe me when I tell you that these are delicious.  They are good for a light weekend breakfast, or as a meal course.

Sunday, March 18, 2018

Gnocchi

Hay smoked potato gnocchi.
As far as I know, I am German and French Canadian, not Italian, which means that I can't say that I make authentic Italian food.  On the other hand, it gives me license to not abide by any rules of Italian cooking.  But, that is the fun of cooking.  I have always been a bit perturbed when people get up in your grill about how something should be cooked.  Like how spaghetti carbonara should be made with guanciale and not pancetta like many people use. I say, if you can get guanciale, use it, but if you can't, or would rather use pancetta, or bacon for that matter, do it.  There's no such thing as pasta police.  At least, I hope there isn't.

So, what is gnocchi, besides awesome?  In a nutshell, it is a dumpling.  It is commonly made with potatoes, but can be made with semolina, flour, etc.  It seems like every culture has a dumpling.  I grew up eating spaetzle, which is a small, German drop dumpling.

As I have mentioned before, my goal is not to have a recipe blog.  They are dime a dozen.  Rather, I want to share ideas and techniques to help you become a better home cook and is aimed at an intermediate audience.  One way to do that is to think outside the box, so to speak.  For the dish above, it came to be due to having about two pounds of hay smoked potatoes that I had prepared for a dinner engagement with a dear friend.  The engagement ended up getting rescheduled, so my first thought was of me eating hay smoked mashed potatoes for the next few days.  Normally, not a bad deal, but I had just gotten done eating hay smoked mashed potatoes the previous few days before.  So, I kind of had enough of them for a week or so.  So, what to do with the smoked potatoes.  Chips, maybe.  Fries, even better idea.  Fried, maybe not today.  Then it hit me, gnocchi.  As I am no stranger to making gnocchi, it seemed like a good idea and was punctuated with the fact the potatoes were hay smoked.  Bonus.

Again, there are tons of recipes already posted about gnocchi, but just to summarize at high level:

  • Boil your potatoes
  • When done, drain and let cool
  • Put them through a ricer.  It makes for an easier time mixing the ingredients.
  • Add flour, and egg yolk or two, an salt to taste.  I used 1 kg or potatoes, 150 g flour, two yolks, and salt to taste.
  • Mix the dough until it forms a ball
  • Kneed the dough on a floured cutting board
  • Cut the dough in about 8 pieces
  • Roll the dough into a "rope" about the diameter of your thumb
  • Cut the "rope" into 1/2" pieces
  • Use your finger to dent each one
  • Put in simmering water until they float
At this point, they can be served with some sauce of your choice, or you can brown them in some olive oil, then finish with some butter, herbs, or a sauce.  If you don't plan to consume them right away, they can be placed on a non-stick cookie sheet and refrigerated for a couple hours until dinner, or frozen, then placed in a plastic bag and kept in the freezer for a couple weeks.

As far as the ones picture above, I just fried them and hit them with a bit of basil and arugula pesto.  They were very delicious, and I thought the smoke flavor was very subtle.  It is also worth mentioning that I ate them several times this week, since I had two pounds of them.  In total, I had them with:
  • Pork ragu
  • Butter and sage
  • Pesto
  • Sausage and arugula
Each arrangement was fantastic.  Gnocchi are only limited by your imagination. It also seems prudent to mention that although it seems like quite a bit of work at first glance, once you get the dough made, you can be rolling, cutting, and denting while the previous batch of gnocchi simmers, and before you know it, you are done.  These are a definite "must try" recipe.

Sunday, March 11, 2018

Hay Smoked Mashed Potatoes

Hay smoked mashed potatoes.

Let's face it, I'm by no means avant garde with most of my cooking.  Rene Redzepi is.  He has arguably the best restaurant in the world with a large staff and they spend their days inventing new flavors and techniques.  But I was bored.  So very bored.  Winter stared in November and has not let up for months.  Just snow, ice, and cold.  This is something out of research not my brain.  But like most of my posts, I am trying to sum stuff up from my research.  For starters, smoking or cooking in hay is not a new thing.  People have been doing it for years in the old world.  It is not a technique that you stumble across in day to day "let see what Pinterest thinks I should have for dinner" surfing.

So, where did I find this idea and why did I try it?  I heard about it at some point and kind of put it away in the back of my mind.  Finally, I decided to try it just for kicks, but mostly out of boredom.  One of the things I noticed in my research was how the definition of hay was not defined.  It was just referred to as hay, like you could go to your local market and pick up a bag of it.  It would be hanging there with the word "Hay" on the bag.  I spent enough time in the Midwest bailing the stuff to understand is a general term.  Basically, hay is dried forage.  Meaning food for animals.  Hay can be any edible grass or plant that animals can eat that can be cut, dried, and stored.  If you mow the ditch around a highway, rake it into a wind row, let it dry, and bail it, you have hay.  It may contain many different plants, but mostly grass.  Now, if you bail dried stalks of wheat or oats, you have straw.  That is used for bedding for animals and is not the same as hay.  So, hay goes in the feeder and straw goes on the floor.  Hay is green, straw is yellow or gold in color.

That being said, hay can be made up of many different things.  Where I grew up, alfalfa is the main type of hay.  For this recipe, we will be using alfalfa and Timothy hay made from Timothy grass.  So, you may be thinking that you really enjoy sitting next to a wood fire roasting marshmallows and hot dogs.  The smell bring many people back to a camping trip of fireplace during a cold winter.  A grass fire does not bring about those memories.  We associate grass fires with smoke and stink.  Not something we would put in a fire pit and cook hot dogs over.  So why would this be any good.  To be honest, I really don't know, but it is.  In fact, it works so well with potatoes that it is now my favorite type of mashed potato.  You just need to try it for yourself.

Hay Smoked Potatoes

What you will need:

  • A good vent hood, or do this outside on a grill side burner.
  • A pot that you don't mind making smell like smoke for the rest of its life.  It should have a heavy bottom to disperse the heat.
  • Aluminum foil
  • Timothy hay
  • Alfalfa hay
  • Some Russet potatoes.  I hear you can use just about any kind, but I have used Russets because that is what I had on hand at the time and they worked out swimmingly.
  • Your normal mashed potato ingredients like butter, milk, half and half, salt, pepper, etc.  I would keep it simple and not go crazy with anything else until you try them this way first.
The process:
  • Place a piece of foil on the bottom of the pot.
  • Put about 1 C of Timothy hay and 2 C of alfalfa hay uniformly on the foil.  Hay can be purchased at most pet stores and is relatively inexpensive.
  • Place another piece of foil over the hay.
  • Arrange the potatoes (unpeeled, raw) on the foil.
  • Cover and place on the stove.
  • Turn the stove to high and wait until you see smoke.  Let it smoke for 5 minutes.
  • Reduce heat to low and cook for 50 minutes.
  • Remove the potatoes to a plate and let cool
  • Once they are cool enough to handle, peel and make mashed potatoes like normal.  
Reserve some boiling water if you want to add more smoky
flavor to your mashed potatoes.

What struck me was how pungent the potatoes were after smoking them.  And to be honest, it was not the most appetizing smell.  However, once the skins are peeled off and they are boiled and turned into mashed potatoes, they are mildly smoky.  The smoke flavor is sweet and melds well with the potatoes.  So far, they have been a huge hit an I am glad to have tried them.  I guess that maybe being housebound, in the dead of what I can only describe as one of the seemingly longest winters ever, can yield some rewards. 

Saturday, March 3, 2018

Home Coffee Roasting

Frankenroaster.
Wow, it has been a long time since I posted.  Sometimes life gets in the way.  It shouldn't, but it does.  I guess that is the price we pay for being human.  It kind of puts it in perspective when you think about the human sitting on a bench with his dog.  The human is thinking about work, money, relationships, politics, world events, taxes, etc.  And the dog is just thinking about his human.  It takes a lot of work to shut that other crap off.  One way I try to do that, with varying degrees of success, is to be mindful.  Basically, getting lost in the moment and thinking about only that one thing, whatever it is.

Which leads me to this topic.  The kitchen is one place where, if I make an effort, I can get lost in the moment.  Become mindful.  Get into the flow.  Whatever you want to call it.  I tend to make things in the kitchen that most people just buy.  Some things are because of how sick I am of the ingredients in store bought products, like pickles.  It is getting hard to find any without preservatives or artificial colors.  So, I tend to make my own.  But other things I do, because it tastes better and/or I want to understand the process.  Enter the crazy contraption above.  I called it Frankenroaster for lack of a  better term, but I think it is a apt name.  This all started because I love coffee and finding really good coffee is difficult in my small town.  So, I started doing some research into roasting my own coffee and found that it isn't really that difficult.  You can roast coffee just like they used to do many years ago and use a frying pan.  So, I scoured the internet and found that people did one of the following:

  • Paid a crap ton of money and bought a small commercial roaster.  We are talking at least 4 digits for one of these.  Too rich for my blood.  I would rather have a new motorcycle for that money.
  • Bought a home use roaster.  These go for around $200 for a cheap one, to a few hundred.  Still a pretty big investment for a first time roaster not knowing if it is worth the effort or not.
  • Used a popcorn popper.  Either an air popper or the one with the hotplate, dome, and arms that agitate the beans.  This is actually a pretty good way to go.  We will talk more about this in a bit.
  • Used a frying pan, although, you hear a lot of comments that you "can" use a pan, but not much about people actually using one.
  • Since most of the posts were by guys, there were also a lot of massively over-engineered DIY roasters.  Ingenious and worthy of bragging rights, but I want something I can store in a cupboard and can set up in about 2 seconds.
So, popcorn popper it is.  Now, there are a few considerations for roasting your own coffee:
  • You need something hot enough to roast the beans.  We have already established that a popcorn popper will work.  A hot air popper will get up to around 450 F.
  • It makes a lot of smoke.  And to answer your follow up question, no, it does not smell awesome like fresh roasted coffee.  It smells like burnt coffee and will quickly set off your smoke detectors unless you have a good vent hood, or do it outside.
  • Depending on the type of coffee/supplier, there can be a lot of chaff that comes off the bean that needs to be separated.  A hot air popper will do that automatically for you, but unless you have a way to catch it, it ends up all over your kitchen.  A regular hotplate style popper won't do that for you, so you need to take care of that during the cooling process.
  • And, finally, you need to cool the beans to stop the roasting process.  So, in the case of either popcorn popper, you need to dump the beans into a sieve, or on a screen and hit it with a fan.  In the case of the hotplate style popper, now is when the chaff will blow off, and cause the same issue we talked about in the bullet above.
So, given all this information, I decided on the hot air approach.  It is worth noting that there is a roaster or two on the market that are based on the hot air approach.  Both ratings and price turned me off.  One that had decent ratings (except for the person who had one start on fire) was still close to $200.  I really didn't want to risk that money for something I didn't fully understand yet.  So, I found a Poplite air popper on Amazon for $16.  Not much to spend if things don't work out.  So, this was the method:
  • Place 1/2 cup of green coffee in the popper
  • Put the cover on
  • Set up my small clip on fan nearby for cooling
  • Place it on my cook top with the vent hood at full bore
  • Plug it in
  • Place mesh strainer over the output to catch the chaff
  • Roast the coffee through first crack and into second and catch about 30% of the chaff while the rest goes all over the place and also losing quite a few coffee beans because they blow out way more than popcorn.  I assume it has something to do with the larger surface area of the coffee bean.
  • Once roasted, unplug the popper, blow out the strainer in the sink, again, making a mess, and pour the beans into the strainer
  • Hold over the fan and stir with a spoon until cool enough to handle
The result was a decent batch of coffee.  A messy cook top.  My clothes and hair smelled like burnt coffee.  And it was kind of a pain in the ass.  But, the final product was good enough to merit another round.

Fast forward to Frankenroaster.  This design was based on the hot air roaster I talked about above, because it made sense to me, although I still didn't want to shell out $200.  I ended up making mine for under $40 and the only part that can go bad is the popper, and I can replace that for about $20.  What I used to build it:
  • 1 - Poplite popcorn popper
  • 2 - single-pole toggle switches (120V of course)
  • 1 - 15 oz food can with both ends removed.  It fits nice and snug into the throat of the popper.  I could have used a piece of 3" aluminum duct, but I thought the reducer (next bullet) would fit right into the popper.  It did, but has a lot of gap which beans got caught in, so not wanting to go back out in the dead of winter to get a piece of duct, I was resourceful and found that a 15 oz can works.
  • 1 - 4" to 3" aluminum duct reducer
  • 1 - 4" piece of aluminum duct about 8"-10" long.  Mine was an adjustable bend as I was experimenting with the design.  In the end, straight up works the best in my opinion.
  • 1 - 4" dryer vent clamp
  • 1 - piece of single layer cheese cloth for the chaff catcher
  • A drill, drill bits, screw driver, utility knife, pop rivets, and a couple wire nuts.
Warning:  If you are not handy and understand electricity and wiring, don't attempt this.

The method:
  • Open the popcorn popper by removing the screws on the bottom of the case.  You will end up with the bottom of the case, three screws, a fan/heat source, a metal throat, and the main case.
  • Remove every other vent rib on the bottom of the case to increase air flow.
  • Figure out which wire is the main power and which one leads to the main heat coil.
  • Drill two holes the same size as the toggle switches.
  • Wire up one switch for the main power and one for the heat source.
  • Mount the switches and reassemble the popper.
  • Test it to make sure your switches are correct.  I found that the main heat switch, when off, still produce a small amount of heat, but only slightly higher than room temperature.  Still enough to cool the beans and I didn't want to get to in-depth on rewiring it.  Simple is always better.
  • Since the reducer duct didn't fit into the can very well, I chose to push the can through from the 4" side.  Since the can was steel and the duct was aluminum, I forced it through fairly easily.  Wear leather gloves, this is just an emergency room visit waiting to happen if you don't.
  • Add the 4" duct and secure all pieces with a few pop rivets.  This is what I will refer to as the chimney assembly, for lack of a better term.
  • Clamp the piece of cheese cloth on the top.
  • Remove the Poplite label and make your own label, plus one for the main power switch and one for the heat switch.
  • You have a coffee roaster!
Now that the hard work is done, what is my new and improved method for roasting coffee?
  • Take roaster out of cupboard and place on cook top.
  • Turn on vent hood.
  • Remove the chimney assembly.
  • Dump in 1/2 cup of green coffee beans.
  • Replace chimney assembly.
  • Plug it in.
  • Turn on the master power to make sure the beans are moving around freely.
  • Turn on the heat.
  • Sip a cup of coffee an listen.
  • First crack will sound like popcorn popping.  Pretty loud.  You need to go through this stage in order for the beans to be roasted.
  • Once it is done with the first crack, it will quiet down, but soon will start the second crack.  Second crack sounds like Rice Krispies.  Once it starts second crack, you have a light roast and the further through you go, you get a darker roast.  You will need to experiment to find what you like, but since this device can only do about 1/2 cup at a time, it is easy to do.
  • When it is roasted just about to where you think you want it, turn off the heat and let the fan cool the beans.  This is the beauty of the air popper.  I find that 2-3 minutes is about enough.  You can always use an infrared thermometer to monitor things.  I got mine on Amazon for about $16.  I love Amazon.
  • Turn off the roaster while removing the chimney assembly at about the same time.  It will keep the chaff at the top on the cheese cloth.  Use a towel or pot holder because the metal will still be too hot to handle with bare hands.
  • Pour the coffee in a container.  Depending the type of beans you use, it will be ready to grind in 1-4 days.  Don't grind it right away.  It is not ready and you will be disappointed in the result.
Stuff I have learned along the way:
  • Coffee doesn't smell wonderful when you are roasting it.  It stinks.  So will your house if you don't have a good vent.
  • Coffee needs to out-gas before you should use it. 
  • Some coffee has very little chaff and others have copious amounts.
  • Some coffee is very noisy during first crack and some is not.
  • Some coffee is very noisy during second crack and some is not.
  • Some coffee, such as my personal favorite Papua New Guinea, goes through a huge flavor profile change over 4-5 days.  It starts out, as all do, burnt smelling, then after a couple hours have huge caramel tones.  This starts to fade over 3-4 days, but the flavor becomes more complex.  Experiment with it.  It's fun.
  • I may not be a world class coffee roaster, but it tastes better than most anything I can find from a coffee shop.  You simply can't beat small batch roasting.  This is the coffee equivalent of home brewing.
  • Amazon is a great place to buy green beans.  Even better if you are a Prime member.
Well, there you have it.  Anyone can roast coffee at home.  I roast about 2-3 time per week and is quick to do.  For 1/2 cup, you are talking around 10-15 minutes, of which you spend most time just listening, and hopefully, relaxing and dreaming about drinking it.  I hope you find this article interesting and useful.  I didn't really find anything like this when I was researching, so I wanted to help people who, like me, want to take the time to roast their own coffee and don't mind spending about 30 minutes total to build a cool roaster that I don't feel is over-engineered.  I am an engineer by profession, and we like simple, elegant solutions.  Well, one out of two isn't bad.

Saturday, March 21, 2015

Making Chicken More Interesting

Chicken Ballotine.  Photo by Rob Robitaille
I love chicken, but let's face it, chicken can be very boring.  My wife has a peculiar digestive system where she finds that she can no loner tolerate mammal meat. So, that just makes my life as the cook a bit more difficult as it cuts out many delicious options.  So, instead of viewing it as a problem, I am choosing to view it as a challenge.  After all, the French love their chicken.  So much so, that they made it their national bird.  Okay, it's the Gallic Rooster, but it is still a chicken.  And being lover of French food that I am, I have started looking that direction for help.  One thing that I have been meaning to try is a chicken ballotine.  A ballotine is meat fish or fowl that has been boned, stuffed, tied into a bundle, and roasted or braised, and served hot.  Often confused with galantine, which is similar, but poached and served cold.  You are probably thinking, as I did, that boning a whole chicken is difficult, but it is not.  If you don't mind handling chicken and have some basic knife skills, it is actually pretty easy.  My first time only took about ten minutes start to finish.  I am not going to describe how to do it, because there are tons of videos and instructions all over the web.  However, as I have probably stated before, Jacques Pepin is an absolute technical specialist with this, as he is with pretty much everything in the kitchen.  Just head to YouTube and search for "chicken ballotine" and it will probably be the first hit or just click here.  The video is only 10 minutes long.  He says that it should only take around a minute to bone out a chicken.  Yeah, maybe for a chef that does it all the time, but I think five minutes would be achievable for the amateur cook.  Mine didn't look as nice as Jacques', but all the mistakes are on the inside, so don't worry about it.

I made a simple stuffing of sauteed mushrooms with a shallot in butter.  Once the mushrooms had cooked down a bit, I added chicken stock, a bit of salt, and white pepper.  Once most of the liquid had been cooked away, I removed it from the heat and let it cool.  Once cool, I added some grated Swiss cheese and some bread crumbs.  Then I stuffed the bird, tied it up, and roasted it at 425 for about an hour.  A simple pan sauce made with the fond from the roasting pan completes the dish.  Relatively easy and very delicious, I know I will be making this for guests in the future.


Sunday, December 7, 2014

Smoked Shrimp Cocktail

Smoked Shrimp.  Photo by Rob Robitaille
It has been a while since I last posted, a whole summer, in fact.  It was just so busy with work that it blew right by.  So, now it is time to make up for the stress and pressure by being a hermit in the throws of our particularly nasty Minnesota winter, which happened to start early this year.  I'm not complaining, though.  When there is snow on the ground, I don't have to feel guilty about the lawn that needs mowing, or weeds that need pulling. I can just "be" and do fun stuff.  Fun stuff like flying micro RC planes and helis at the gym at work with my buddies, and of course, cooking.  Good times.

So, recently I started reflecting on the food I love and was preoccupied with the question that I ask myself often: "What single dish do I make that I think is better than anyone else makes?"  Good question for a non-professional cook.  Then, as I was weeding though my kitchen cupboards trying to gain back some room, I ran across my Burton stove-top smoker.  I hadn't used it in a years and debated whether I should keep it or not.  Then it hit me.  Smoked shrimp cocktail.  The perfect thing for a small smoker, and it just happens to be one of my best dishes.  I usually use my regular smoker, but it's outside and it's really cold out there, not to mention yetis.  So this stove-top model is the cats pajamas.  Easy to use and almost no chance of a yeti attack.

The best part about this is how easy it is.  If you have a smoker, of course.  I like to start with extra large shrimp.  26/30 are my favorite for this.  If you go smaller, the smoke may overtake the shrimp a little.  If you go larger, they just get more expensive.  So, 26/30 seems to be the sweet spot.  I like raw, shell-on shrimp that are already split on the back, EZ Peel as they are commonly referred. The process is simple.  First, soak some wood chips, about 1-2 cups worth, in some warm water.  I like alder because it compliments delicate food like fish and shrimp without overpowering it.  Then, thaw the shrimp in some water.  When thawed, add a good amount of kosher salt to the water.  Don't be shy.  The shells are on and the shrimp will only be in the  brine for about 15 minutes, so this is pretty difficult to over-salt.  After 15 minutes, drain the shrimp and give them a quick rinse.  Then arrange them on the smoker rack and let them dry off a bit.  It will help the smoke stick.  Once the shrimp are dry, assemble your smoker according to the instructions.  With my smoker, I line the bottom with a piece of foil and arrange the, drained, wood chips in a neat layer.  Then I put the drip pan in, lined with another piece of foil, and place the rack of shrimp on it, slide on the cover, and put it on the cook-top over medium high heat.

Once the smoke starts I reduce the heat to medium, or medium low depending on the burner and let it go, checking occasionally until the shrimp are just done.  The shrimp should feel firm, but not rubbery when they are done.  A good exhaust vent is important for this as you can make your house smell like the inside of a smoker if you are not careful.  Then your spouse will point that out numerous times as part of general conversation.  When done, remove from the heat and remove the rack of shrimp.  Now, get them chilled down as quick as possible.  In the winter, I just put the rack on the window sill and let Old Man Winter blast chill them for me.  Otherwise, put the rack on a cookie sheet and place them in the fridge.  Once they are cold, you can eat them immediately, or store them in a container in the fridge for up to 4 days.

To serve, peel the shell off.  It is easy if you hold the shrimp, back toward you and tail pointing down.  Then grab the shell on each side of the split, at the top, and peel open, just like opening a book.  Once the back is open, you can pinch the tail at the bottom from the sides and the shrimp should pull right out.  It make take a little practice.  So, you may be asking, why leave the shells on?  There are a few reasons for this; 1) It adds lots of flavor, 2) it keeps the shrimp from becoming overpowered with smoke, and 3) it slows people down so they don't just inhale them one after the other.  We have all seen it.  That one person that pulls the chair up to the appetizers and eats shrimp like a kidnap victim.

As a final thought, these little gems deserve a homemade cocktail sauce.  I like to whip together a simple cocktail sauce with 1 cup of ketchup, some L and P to taste, juice of 1 lemon, grated horse radish to taste, and a splash of your favorite hot sauce.  It is best if you make it at least an hour ahead in order for the flavors to meld.  This is way better than any store bought sauce and so simple.

There you go.  Easy and very delicious.  These always are a hit, so I hope you try them.  Enjoy!


Sunday, June 22, 2014

Re-purposing Leftovers


Cod fritters and ponzu aioli.  Photo by Rob Robitaille
I love leftovers.  Leftovers means an easy, delicious meal.  But I may be in the minority.  I hear a lot of people say that they hate leftovers.  That one kind of boggles my mind, but maybe it is due to the replay of flavors.  I admit that I rarely eat leftovers in the same form from one day to another because I want something different, so I remake them into something else.  I think that is what keeps things interesting.  Take the cod fritters, for example.  That was a nice way to get rid of mashed potatoes and cod.  When all else fails, most anything can be turned into soup or a casserole.  It's all up to your imagination.

I think I inherited this skill from my mom.  In our house, a roasted chicken always led to chicken a la king, and then onto soup.  A pot roast seemed to lead to hash, which I hated with a passion, but my dad just loved.  Mom would grind up all the remnants of the pot roast and fry it on her electric frying pan until it was brown on both sides.  Then dad would drench it in ketchup and mustard and would carry on like it was the best thing ever to come out of a kitchen.  I, on the other hand, could barely choke it down regardless of how much ketchup and mustard I dumped on it.  To me, left over pot roast can be turned into stew, or a pot pie, which is delicious.  Corned beef hash, well that is another story indeed.  One could argue that the initial boiled dinner of corned beef and cabbage is just a necessary step in order to get corned beef hash, which is fantastic with a fried egg on top.  Meat loaf was turned into meatloaf sandwiches.  Again, dad loved them, but cold meatloaf leaves a bit to be desired, in my opinion.  So, I get why people can tend to hate leftovers.  But there is hope.

Re-purposing them is not a science, but an art that you need to learn over time.  However, the best way to learn it is to always think about where today's meal can lead.  Left over noodles:  mix in some onions and fry them in a pan with butter until golden brown on each side.  Left over meatloaf: well...sandwiches.  But fry them in some butter to make the sides golden first.  Or grind it up and mix it with mac and cheese.  Left over lamb chops:  I have never had left over lamb chops.  I would rather be up all night with a gut ache from eating too many lamb chops.  They are just that good.  Mashed potatoes:  fritters or fixed with some egg and flour to make pancakes.  Or, fry up some mirapoix, add some chicken stock, and mashed potatoes to make a nice potato soup.  Asparagus: I'm thinking omelette.  Steak:  Easy.  Sandwich.  Cut a baguette in half, brush with garlic butter, steak on one half, cheese and onions on the other, and broil until brown, bubbly, and delicious.  Crepes:  Slice them up and add them to soup as a type of noodle.  My German relatives did that all the time.  Beats:  Shred them and add some vinegar and oil to make a light summer salad.  Once you start thinking like that, it starts to get easy.

The point is, think outside the box.  It is really hard to fail to the point where you just can't eat something, so give it a go.  Some of the best things I have ever eaten have been creatively used leftovers.

Saturday, June 14, 2014

Pulling Off the Dinner Party

Preparing for the dinner party.  Photo by Rob Robitaille
Dinner parties can test the mettle of any good cook, and can become a nightmare for the less experienced.  While each dish may be easy for even the less experienced, bringing things together at the same time is the trick.  While not always on time, I must admit that I can usually pull together a dinner party and have things done properly and on time.  But this skill didn't just happen, it takes a concerted effort and will on the part of the cook.  Here is a brain dump of my experience that I hope you may find useful for your next gathering.

Here are some questions I ask myself when planning a dinner party:
  • What time is dinner?  Is everything going to be served at the same time, or will they be served in courses?  These times are used to figure out the start times for all the components of the meal.
  • Are there things that can be assembled/cooked ahead of time like appetizers, soup, certain types of salads?
  • What do I need to prepare for my mise [en place] and when should I get that ready?  Typically mise can be done ahead of time on the same day.
  • Will I be able to complete everything on time based on the number of items and complexity of those items?  If not, should I adjust the menu, or can I commission someone's help?
  • How loquacious are my guests?  Quiet guests make it easier to complete any last minute cooking tasks, while more talkative, gregarious guests can unintentionally work against you.  I can't tell you how many times I have forgotten to do something because I was sucked into a conversation (and beer).
  • Do I have enough pans for everything I want to make?
  • Do I have enough burners for all the pans?
  • If you have a single oven, as I do, will I need to cook more than one thing in that oven?  If they are at the same temperature, no problem if you have the space, otherwise you may need to re-think things a bit.
Here are some things I do to make things easier on myself that you may find helpful:
  • Soups, stews, and things like jambalaya are a perfect course to make a day ahead and reheat on the day of the party.  You will want to wait until the day of to add certain ingredients, depending on your soup, like rice, noodles, certain vegetables that cook quickly, and perhaps the meat.
  • Lettuce can be chopped a day ahead and kept quite nicely in a salad spinner (if you don't have one, get one.  They are great!).
  • Many deserts can be made a day ahead.  These are some common desserts I like to make that are particularly suited for advanced cooking: cheese cake, crème brulee, ice cream, and chocolate cake.
  • Write down everything you are planning to server and at what time.  Place that list in an obvious place so you see it as a reminder.  It seems like a no-brainer, but it is easy to forget the garlic bread waiting in a warm oven once you start your courses and get involved with your guests.
  • Arrange some help.  Many people that we have over are either foodies or at least know their way around a kitchen and never mind pitching in when needed.  Heck, even people that are not at home in a kitchen can be good helpers if you break their tasks down and tell them exactly what you need from them.  Anyone can help assemble a salad or put the garlic bread into a basket for serving.
  • I like to prepare my mise an hour or so before starting to cook everything.  They can be covered and refrigerated until needed.
  • When the mise is needed, I arrange in in groups on the counter in the order that they will be used.  That way it is self documenting on what goes into a dish and when.
  • If you are planning on drinking alcohol when your guests arrive, make sure you have a little something in your stomach before you do and try to pace yourself.  I don't know about you, but alcohol seems to affect my memory first and that is sometimes why I find that loaf of garlic bread in the warm oven after the meal is over.  By the way, that was also hands-down the best garlic bread I have ever made.  We still ate it; we just had it after dessert.
  • If you are serving meat, plan around a quarter pound per person, or a half pound if your guests are carnivores.  I have a friend that works out and runs almost every day.  I usually plan more when he comes over.  Also, younger guests generally eat more than older guests.
  • Most important, don't freak out if things don't go according to plan.  I usually like to server more but smaller courses, so it is easier to absorb a problem.
I have said it before and I will say it again.  Typically, you serve your friends and family to a dinner party.  It's not someone from Michelin, or the James Beard Foundation.  It's okay if things don't go as planned.  They will be okay with it and won't tell their friends "It was a perfect evening until Rob forgot the garlic bread in the warm oven.  What a dork.  It's just, like, beyond ridiculous.  I totally can't believe it."  The point is, have fun above all, but keep your head in the game so you look like a super star and not a dork.

Saturday, June 7, 2014

Radishes. Something New?

Sauteed radishes.  Photo by Rob Robitaille.
I grew up eating radishes.  It seemed like we always had them on hand when they were in season.  As with most American families, radishes were always served as a garnish, raw with salt, or sliced on a salad.  But radishes are so much more than crunchy, sometimes hot and spicy, juicy little roots.  Raw radishes with some butter is sublime, but my favorite way is sauteed with their greens.  The French have always known that radishes and butter are a combo made in heaven, so why is America so uninformed about these gems?  Again, I love my country, but we are really behind, in general, on the whole good eating thing.  Granted, there are cities in this country that have world class cuisine, but a larger part of our country doesn't live there.  Most of the country eats good, honest, but lets face it, very typical food.  And no disrespect intended toward all those folks out there. After all, I study this stuff every day and managed to miss this gift until recently.  This was one of those things that was, in my opinion, so good that I had to tell someone.  And I am not alone.  There are many out there that feel the same way, and unless you seek them out, you will never know that they exist.

So what does a sauteed radish taste like?  Well, a sauteed radish.  And that is what is so great about it.  It is rare that, once you become an adult, you taste something that is not unlike something else you have tasted.  One of the sucky things about experience is that you get to a point where you hit the "been there, done that" place that we really don't want to be in.  The best part of this was that it was a "Wow!  Never been there before." kind of moment.  Now, I don't want to get anyone's hopes up too high.  After all, this is simply my personal taste.  But, I think most people would agree that these are delicious.  My wife, Miss Picky Pickingham even admitted that these were the only vegetable she liked better cooked than raw.  It's all about thinking outside the box, which is hard to do.  You get into the paradigm that certain foods can only be consumed certain ways, but that is what separates the cooks from the chefs.  Don't get me wrong, I am a cook not a chef, and I will never say that I am a chef (unless I actually become one, which is really unlikely).  I'm talking David Chang, René Redzepi, the Brothers Adrià, and so many more of the great culinary inventors.  The ones that say, what if?

So, what is my point?  I'm not really sure, to be honest.  This started out as a shout-out about a little known, but very delicious treat that most people don't know about.  I would be willing to bet my 1922 Peace Dollar that you could stand on a street corner all day in small town America (where I live, in fact) and ask people if they have eaten cooked radishes and you may be lucky to get one person all day that has.  But then my post took a hard left into the realm of what more is out there?  My recommendation is this; go to the farmers market, or other favorite market and buy something you are familiar with.  Something you take for granted.  The research it to see if there is something really different you can do with it.  I hate to keep saying it, but see what the French and Spaniards are doing.  After all, they are on the pinnacle of  the culinary arts.  As for me, and I am guessing most people, we don't have that gift that the great chefs have.  The ability to decipher what something can taste like with a bit of manipulation.  Although I can be creative in my own right, I still require some inspiration.  But thinking outside the box is critical to creativity.  I don't know what the silver bullet is, if there is one.  Maybe it is as simple as just go forth and boldly cook.  And above all, have fun.

Sunday, June 1, 2014

Roughing it in Arizona


Lamb chops and rosemary potatoes.  Photo by Rob Robitaille
Recently, my wife's brother was married in Arizona.  To be honest, I never even considered Arizona a place that I would want to visit.  But after chatting about it with my wife, we decided to extend the wedding trip into a vacation.  I have to admit that I instantly fell in love with Arizona.  Every concept I had about the state turned out to be wrong, in a good way.  The dessert was blooming, birds were everywhere, and the "dry heat" concept is true.  The only time I broke into a sweat was hauling my wife's suit case up two flights of stairs to our second floor room at the inn that we stayed at the first three days.  Other than that, the weather was great.  On top of that, the food was also equally as good.  After the weekend at Fountain Hills, which was a very nice community decorated with many Mercedes, Porches, Ferraris, and at least one Maserati that I could find, we headed south, past Tucson, to the Medera Canyon.  Fountain Hills was nice, but Medera Canyon is my kind of place.  My wife was primarily responsible for planning the vacation, which was fine my me, and she did a great job.  She found the nicest B&B I have ever seen.  If there is a better one out there, you have to prove it to me, because the Chuparosa Bed and Breakfast is the best, in my opinion.  The owners, Luis and Nancy, are top notch.  The fluffy quiches and yogurt parfaits were outstanding, and the inn itself is beautifully maintained and cared for.  After all, it's their home, too.  As with all B&Bs, breakfast is provided (hence the term), but you are on your own for the rest of the meals.  We happened to be about 15 miles from the closest town of Green Valley, so we picked up some groceries to make our own meals, which was great, because hanging out at a great inn, with great people, and getting to cook is my idea of a wonderful vacation.  If you like meeting people from all walks of life, B&Bs are fantastic for that.

Our stay at Chuparosa was proof that you don't need a lot of equipment to make a fantastic meal.  I was armed merely with some good ingredients, salt and pepper, aluminum foil, paper plates for prep, and a wickedly sharp Swiss Army knife (never travel without it).  Much to my joy, Chuparosa has an abundant supply of rosemary bushes, which they were more than happy to share with us.  On the first night staying anywhere that I will be cooking, steak is the traditional celebratory "WE'RE ON VACATION!" meal.  However, I found some nice racks of lamb at the grocery store as well as some nice steaks.  Now my tradition is steak the first night, unless you can find a rack of lamb.  The outdoor cooking area, complete with a monster sized grill, was conveniently located about twenty feet out our door.  The first nights menu, grilled rack of lamb, rosemary potatoes, and a salad which we ate outside in the beautiful, clear, calm day at our own private table.  Very special.

This trip reminded me of one of the basic rules of cooking.  Less is more.  I know, people cringe with that phrase, but it is really true.  Americans, in general, tend to lean toward the mantra of more is better.  More ingredients, bigger portions, etc.  I would rather eat three small lamb chops than a huge steak any day.  Period.  So, let's talk about this lamb, since there is a picture of it above.  If you have never tried lamb, I encourage you to give it a shot.  It is actually quite simple and the only way you can really screw it up is if you over cook it.  You can serve it up to medium, but medium rare is even better.  If you are a well done kind of person, then maybe this isn't for you, because well done lamb is just sad.  While you can find individual lamb chops, which are fine, I prefer to buy a rack of lamb chops because the presentation is better and they are less work because you only have to cook one thing.  They usually come with the bones frenched, meaning cleaned off like you see in the picture.  All you need to do is season the meat and cook them.  I personally like the seasoning Spike Original Magic, which you can find in almost any grocery store. It works well with lamb, but feel free to come up with your own special mix.  The seasoning can be done a while in advance, up to a couple days.  To cook them, you need either a hot grill or heavy pan that is smoking hot.  If you use a grill, it is a good idea to fold a piece of aluminum foil over the bones so they don't burn, which, besides making them ugly, will reduce their usefulness.  After all, the bones are handles.  More on that in a second.  Then, sear each side to make a nice crust.  At this point they will be rare to medium rare depending on how thick the roast is.  If you like them that way, take them off now.  If not, reduce the heat of the grill, or if you are using the pan method, move them into a 325 oven and finish them to a medium.  Remember, as long as they don't go past medium, you are in for a treat.

Then, and this is probably the second most important step besides cooking them properly, let them rest.  Resist the urge to cut into them, because all you will do is dry them out.  Right now, the lamb is hot and the pressure inside is higher than the outside, so if you cut into them, all the wonderful juice will be pushed out leaving you with a puddle and dry chops.  This rule is so important for any cut of meat or poultry, by the way.  So, grab another beer, or have some more wine, or just put your hands in your pockets and give it about 10 minutes.  After that, hold the roast by the bones and cut between each one to separate it into individual chops.  Now you can dig in.  About the handles I talked about, I don't think I have ever seen anyone, even my mom, use a knife and fork on one of these.  Just pick them up and enjoy.  Once you taste one, you will see why the lamb lollipop method is the best.

It has been a few weeks since our trip and I really miss Arizona and my new friends at the Chuparosa, but we have already made reservations for next year, so I have that to look forward to.  In the meantime, I will enjoy the bounty of the farmers market and go forth and boldly cook. And above all, have fun.

Sunday, April 13, 2014

For the Love of Charcuterie

Charcuterie board from the Happy Gnome.  Photo by Rob Robitaille.
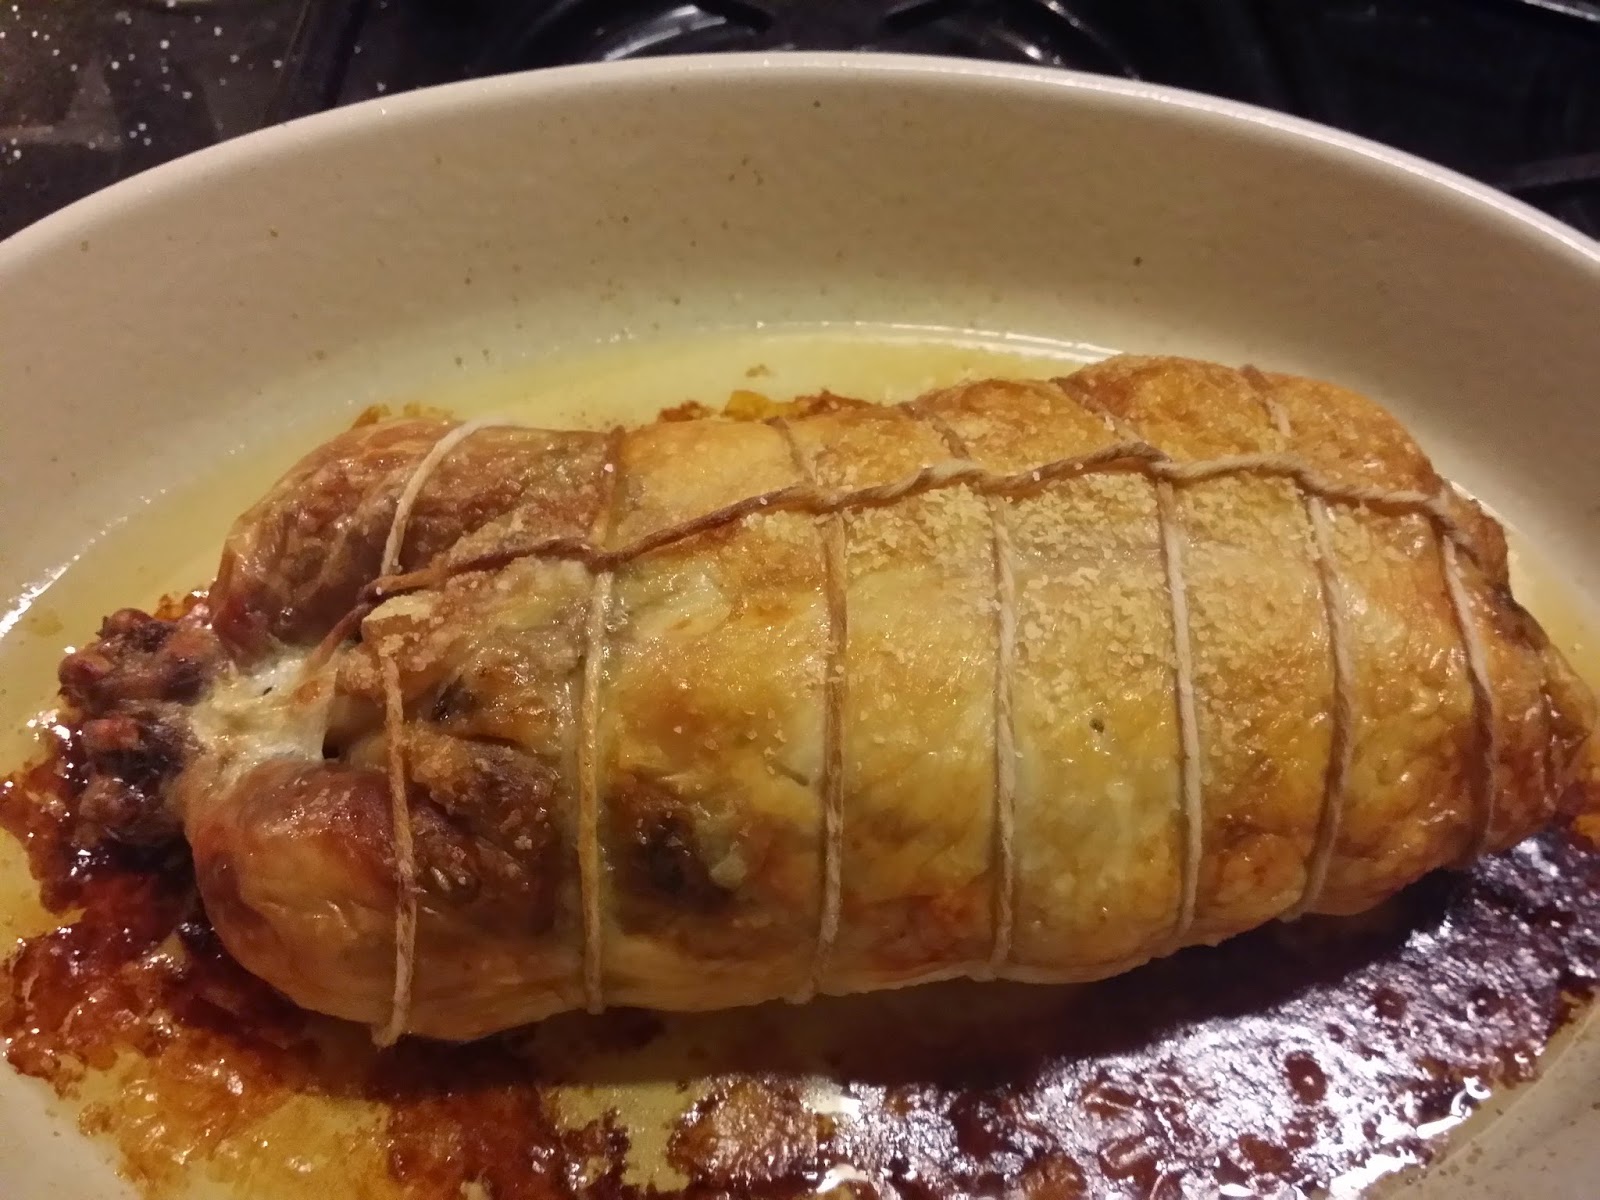
I don't like charcuterie.  I am passionately in love with it.  I can think of few things so gratifying to eat.  Charcuterie, when well executed, is incredibly flavorful and decadent.  But, what is charcuterie?  If you are unfamiliar with the term, I will bet that you know exactly what it is and have probably eaten it.  Charcuterie was a way to preserve meat, typically pork, in the days before refrigeration.  The process typically involved some type of salting/curing, smoking, drying, or potting.  Today it exists simply because it is delicious.  Some common, modern examples of charcuterie are ham, bacon, dry cured sausage, pastrami, corned beef, confits, and rillettes, to name but a few.  I have always dabbled in the art of charcuterie, but really became passionate in the past ten years. So, lets dissect this a bit and talk about some of the main areas of charcuterie that most people would care about.

Salt Cured Food

This is one that most people are familiar with.  The important thing about salt cured foods is that most, but not all, also use sodium nitrate/nitrite, which are critical in dry cured foods in order to protect against botulism.  The process is complex, but just be aware of the role sodium nitrate/nitrite plays in curing.  Examples of this type of food are bacon, prosciutto, pancetta, ham, corned beef, pastrami, sausage, beef jerky, and gravlax, just to name a few.  This is a prime example of the carry-over from the need to preserve, to not being able to imagine life without these.  Can you imagine a world with no bacon?  Steven King couldn't even top that horror.  Once cured, some of these foods, like corned beef, are simply cooked.  Some are served as is, like gravlax.  Some are smoked, like bacon, pit ham, and certain types of sausage.  And then there are some that are hung to dry without any cooking, like prosciutto, pancetta, some types of ham, beef jerky, and sausages like salami, soppressata, pepperoni, chorizo, and bresaola.

Although most salt cured foods are a type of animal protein, it is not limited them.  Fruits and vegetables can be salt cured as well.  Examples of this are sauerkraut, preserved lemons, fermented pickles like the ones you get at a good deli, and kimchi.  Not surprisingly, I have every one of those examples in my fridge right now.

Confit and Rillettes

Confits are essentially foods that have been cured, placed in an earthenware container, covered in fat, then slowly cooked until extremely tender.  Then, they are left to cool so that the fat firms up, thus sealing the food and preserving it for an extended period of time.  On the of most popular examples is duck confit, a personal favorite of mine.  Duck leg quarters are salt cured with some aromatics.  Then rinsed, dried and placed in a crock or similar dish and completely covered in rendered duck fat.  The duck is then slowly baked in the oven at round 180 degrees for several hours.  Once done, it is allowed to cool in the cooking vessel and then stored.  They are good right away, but are even better when allowed to "ripen" for a week or two in the fridge. They can be used as ingredients in other dishes, or roasted until the skin is crisp and eaten as is.  They can also be turned into rillettes.

A rillettes is often, but not always, made from a confit.  One thing that remains fairly constant, is that the meat is cooked with a descent amount of fat.  Other things can be added such as onion, carrot, celery, garlic, and any other herb or spice that you like.  The whole thing is then turned into a paste that can be spread on bread.  Like confit, it can be potted and covered with fat as a form of preservation.  In the age of refrigeration, this is mostly just a decadent and wonderful accompaniment to a great craft beer.

Dry Cured Foods

Dry cured foods, as we have already discussed, are foods that have been salt cured then allowed to dry.  Because they are cured and are dry, they will keep without refrigeration for along time.  These are among my favorite because of the buttery feel they have due to the amount of fat in them.  However, this is perhaps the most difficult of all charcuterie in the it is very finicky about temperature and humidity.  Also, our friend, and sometimes enemy, mold can jump in an wreak havoc on even the bet laid plans.  To be honest, outside of jerky, which is sped along with a dehydrator, I haven't dabbled much in this area as I do not have, what I feel, are the right conditions or location for this.  Add a few house cats into the mix and it gets even worse.  So, I have this one on my bucket list and will attempt it at some point when I find the right place.

Smoked Foods

We have already touched on this above, because to really preserve a food, smoked food must first be cured with salt and sodium nitrate/nitrite.  Then, the food is smoked, which adds another layer of preservation on top of the curing.  The process of smoke curing is so complex, that I am not even going to attempt to explain it here.  Let's just say a really complex set of chemical reactions take place that help cure and add flavor.  Again, this is not something that we need to do any longer to preserve our food.  The real fun is more to do with using the smoke as a seasoning.  Different foods lend themselves to different types of smoke.  Fish go better with lighter smoke flavors from woods like alder.  Pork and poultry is good with fruit woods like apple, and nut wood like hickory and pecan.  Beef can take a lot of flavor, so it can be paired with mesquite, hickory, pecan, and walnut.  Let's not forget the little known, but wonderful corn cob, which is great with pork and poultry.  Seriously.  I wouldn't lie about charcuterie.

I hope this has helped you understand charcuterie a little better.  As I said, most people have eaten, or at least heard of most of these foods.  This is just a basic primer into charcuterie, but the subject is very extensive and whole books have been written about it.  If you are interested in learning more, I highly recommend CHARCUTERIE The craft of Salting, Smoking, and Curing by Michael Ruhlman and Brian Polcyn.  It talks about the stuff I discussed above in much more detail and is filled with recipes that most people can do at home (perhaps with the exception of dry curing).  If you really want a deep dive into what really happens when you cure meat and smoke it, I recommend On Food and Cooking by Harold McGee.  McGee, as it is sometimes simply referred to, is arguably the best text on the subject of food and cooking.  It goes into great detail on the physics and chemistry of the kitchen.  Be advised, it is not an easy relaxing read.  It is basically a text book written at the college level, but I recommend it for anyone that takes cooking seriously and wants a great reference for the kitchen.  Have fun.

Sunday, April 6, 2014

The Most Important Tool in the Kitchen - Your Brain

Illustration by my good friend Bradley "Doc" Cripe.  Amazing artist*, philosopher, and all around good egg.

It seems like the more complex life becomes, the less people think about stuff.  I don't know why that is.  Are we too dependent on the things that are external to us without having to put forth any effort?  Television, smart phones, computers, I'm looking in your general direction!  I personally think that it may be the case.  I contend that you need to take ownership an put forth the effort to understand what you are doing, no matter what it is.  Take cooking for example.  Like it or not, cooking, albeit something that everyone can master, is complex, even at a basic level.  Biology, physics, and chemistry are hard at work in the food world, even when we aren't.  Once you get into the game, it gets even busier and you can't expect to sit back and let things sort of happen.  If you do, you will be faced with disappointment most of the time.

So, here is my point.  I can't tell you how many times I have heard someone complain about making a recipe that didn't turn out.  Too salty, dry, mushy, whatever.  They even say that it seemed like a lot of salt, or that it seemed like a long time to cook.  My response is "Who's in charge here?"  The recipe?  No, the cook is, and it is their responsibility to catch these things before they become problems.  I'm not advocating that you need the skills and insight of a professional chef, but at the same time, you are in charge of something akin to a lab experiment each time you make a meal.  Listen to that little voice that is trying to warn you that you are about to screw up. Most of the time when I screw up, and yes, I still screw stuff up, it is because I ignored that little voice.  When things go awry, it usually not come as a huge surprise because I remember that voice that I ignored.  Can things go awry even when you are on top of your game?  You bet.  But a lot of stuff falls under rookie mistakes and most of them are preventable.  Everyone makes these mistakes from time to time regardless of experience level (although I would guess Eric Ripert makes way, way less of them than I do).  When I started cooking I made these types of mistakes because I didn't know any better.  Now, it's because I wasn't using my brain.  Hey, the title says that it is an important tool, but you first need to use it.  Most of the time the prevention of problems is as simple as taking the few seconds to just think about what you are doing.  Which brings me to the chicken soup example.

When you make chicken soup, you need to start at the beginning.  Seems obvious at first, but maybe not.  Let's think about this for a moment from the perspective of someone who wants homemade chicken soup for supper.  The though process should go something like this.  What's in chicken soup?  Do you have the ingredients on hand?  How long does each ingredient take to cook? Are you using prepared stock?  Is the chicken that you are going to add to it already cooked?  How long does each type of vegetable take to cook?  How long does it take to cook noodles?  Once you start to think about all this stuff, you can start to see the soup come together in your mind and you can build the time-line.  I probably goes something like this:  Brown your meat and reserve.  Then sauté some aromatic vegetables in the pot in some reserved fat from the meat.  Add stock and bouquet garni of aromatic herbs along with some salt.  Simmer until the soup has some body.  You may be adding other ingredients during the simmering process depending how long they need to cook.  Remove bouquet.  Add cooked chicken and dried noodles.  Cook until noodles are tender.  And, if you are the son of a German mother, drizzle in some beaten eggs while stirring to form egg "ribbons."  That is a really basic example, but you get the point.  If you throw everything together and cook it until the ingredient that needs the longest cooking time is done, your noodles will be mush and your chicken may have fallen apart into strings.  Even something simple needs to be planned out to some level.  That is not to say a peanut butter sandwich needs much planning, if at all, but most things can benefit from this to varying degrees.  On the other end of the spectrum, many dishes that would be considered advanced, will probably fail spectacularly if a fair amount of planning isn't employed.

Another area that can be problematic, even for people who are very good at thinking their way through a recipe, is determining the quantity of food to prepare.  Typically, this is not too difficult, but it gets more sketchy when you start dealing with foods that change drastically in volume.  Greens and mushrooms are shining examples of this.  These items cook down to a shadow of their original volume.  This is where that brain comes in again.  When you choose mushrooms for a meal, you first need to understand that they yield much less, depending on what you start with.  Let's use a simple button mushroom, or cremini, because they are fairly common.  This example is for something like a side of stewed mushrooms to accompany a steak dinner.  First, I like to remove the stem, because they are a bit woody.  Don't worry, you can save them for soup stocks, so nothing is wasted.  You can see that, before you even cook them, you are losing volume.  Once they stew down, a full pot of mushrooms will be reduced to about half.  The reason mushrooms are my favorite example is because I have been to countless meals where the mushrooms need to be rationed because the cook failed to account for loss.  I typically plan for 1/2 - 3/4 pounds of fresh mushrooms per person depending on their affinity for them.  I hate to run out, but if I make too much, they are excellent left over, or can be repurposed into mushroom soup, or into scrambled eggs.  See, always be thinking.  Same thing with greens, such as spinach.  A huge pot of greens will not amount to much.  In fact they are even worse than mushrooms, it's just that greens are not served very frequently in this area, which is a shame.

I have and will continue to make mistakes in the kitchen.  But they are much easier to swallow when it is something out of my control rather than inattention to detail.  And when it is your fault, accept it and learn by it.  A final note: Everyone makes mistakes but don't view them as failures, but rather a learning opportunity.  You always learn more from them then you do from your successes, and are not to be feared.  So, go forth and boldly cook, and above all, have fun.
 
 
*I have seen Doc draw things on a bar napkin that I would have framed and hung it in my house.

Saturday, March 22, 2014

Good Gravy

Chicken gravy.  Photo by Rob Robitaille
I have watched others make lots and lots of gravy over the years, and it always seemed to be a controlled accident.  But really good gravy is no accident.  It is just takes a few things to happen in order for it to be really good gravy.  But let's back up a moment and discuss what gravy really is.  To be honest, I don't think most people understand it very well.  Basically, gravy is made from the pan juices of meat and/or vegetables and sometimes fish.  Probably the most notable application of this, is from the Thanksgiving turkey, although the same principle applies to anything that has been roasted in a pan like chicken or a beef roast.  In this post, it is all about turkey gravy. 

A nice cast iron, or other heavy pan is best because the gravy can be make right in the pan.  However, you can coax gravy from one of those disposable aluminum pans, which I will touch on in a bit.  The first step in making gravy, once the turkey has vacated the pan, of course, is to pour off all the liquid from the pan into a fat separator, or whatever your favorite method is of separating the fat from the stock, because we will need the stock for the rest of the process.  Following that, you need to deglaze the pan.  To do that, you need to add some stock, water, or an appropriate wine to the pan and put it on some heat.  Gently heat the pan while stirring with a flat spoon or whisk.  The goal is to dissolve all the caramelized bits, or fond, from the bottom of the pan and get them into the liquid.  Often times there is some skin stuck to the pan as well.  Not a problem, loosen that up and get it into the liquid, too because it has a lot of flavor.

Now, if you are using one of those flimsy disposable pans, you can do the same thing, but you will not put it on the burner.  Instead, add hot stock to the pan and loosen all the goodness from the bottom.

Next, you can transfer the liquid to a smaller saucepan.  This makes it easier to work with, and as an added bonus, your roasting pan is half way cleaned up. Which brings me back to the disposable roasting pan, because it's been bugging me since I first mentioned it.  I know that lots of people use them because they think they make things easier.  I hate the damn things and I will argue that they do not make things easier because of a few simple reasons: 1)  You now have to dispose of the thing, so you have to fiddle with folding it up and throwing it out, usually making a mess in the process, 2) a regular roasting pan is half way clean by the process of making gravy, so it will only take a few minutes to finish the job, which is small compared to how much time the whole meal takes anyway, and finally, 3)  the flimsy pans seem to always end up with a hole in them from either a knife or meat fork during the turkey removal process, typically resulting in a mess on the stove or counter and a small chicken panic from the cooking crew.  My recommendation is use a regular roasting pan and don't worry that you can't get all the small stains scrubbed out afterwards as long as it is clean.  I have seen people spend fifteen minutes working on one small spot.  It doesn't have to look like it just came from the store.  It's a roasting pan.  No one is going to be admiring its beauty, anyway.  There, I got that off my chest.

Now that all the goodness from the roasting pan is in a smaller pan, you can add the remaining stock.  Depending on how much stock you gleaned from the pan, you may want to add more.  Most people love gravy, and the only thing worse than bad gravy, is running out of good gravy.  This is your time to adjust the seasoning.  Typically all that is needed is salt and white pepper (unless you don't mind the black specs, then by all means, use black pepper).  You can also haul out a secret weapon, if you need to.  See my previous post.

Finally, it is time to thicken the gravy.  There are several ways to do this, but I prefer a corn starch slurry, which is just some corn starch mixed with enough water to make a liquid.  I will be the first to tell you that this is more of an art than a science since it is hard to know exactly how much gravy you have, as well as people like different thickness of gravy, so you will need to play with it a bit.  I usually start with a couple heaping tablespoons of corn starch and take it from there.  So, to thicken it, just add the slurry to the warm, but not boiling gravy.  Then start whisking and turn on some heat.  You will need to be very attentive at this point to avoid any lumps from forming.  Once it comes up to a low boil, you can turn the heat off and let it cool.  Keep in mind that this will continue to thicken once it cools.  If you think it needs to be thicker, you can repeat the process, but I have always found that no one is really too picky as long is it is not thin like water, speaking strictly from an American standpoint.

The only thing left is to serve the gravy, unless you would like to strain it to remove any lumps.  I personally don't bother with that step because I don't mind a few lumps and so forth in my gravy.  As you have seen, I take a bit of a relaxed approach to cooking because sometimes the little steps to make things look perfect can be a pain in the ass, which just takes away from the enjoyment of cooking.  But, if you don't mind doing those things, I encourage you to do them, and have fun in the process.  After all, this kind of cooking is about having fun and sharing.

Saturday, March 15, 2014

My Secret Kitchen Weapons

Assorted secret weapons.  Photo by Rob Robitaille
What comes to mind when you think about secret weapons?  I always think of some evil genius with some kind of underground lair that has a secret weapon that he plans to unleash on the world.  He also has a British accent, because they make such bad-ass bad guys.  But what is a secret weapon, really?  I think that it is something that you drag out for use when the normal stuff just won't cut it.  whether it be an underground lair or kitchen, it's not really that different.  So what are my secret weapons and why are they "secret".  Well, they are not really secret as much as they are under utilized in the American kitchen.  My main secret weapons are:  alcohol, vinegar, fish sauce, and anchovies.  I have more that could fall into that category, but those are the most used.  Here is how.

Alcohol

I have and still use this a lot.  Many people don't understand its use in the kitchen and never use it.  Some use that insufferable cooking wine.  Rule number one:  If you wouldn't pour some in a glass and drink it, don't cook with it.  Period.  So, why is it important in cooking?  For one, flavor, when paired with the right ingredients.  Also, some ingredients have alcohol soluble compounds that you can reveal by using alcohol, such as tomatoes and chile peppers.  Don't believe me, try it.  You can coax out a lot of flavors that you normally wouldn't by adding it, vodka in particular, to tomato sauces and soups.  It also works well with chile peppers, because they have their share of alcohol soluble flavors.  Many people are concerned about using it in food because they think that you will be consuming alcohol with your meal, an issue for some that need to avoid it, but fear not.  Alcohol boils at a lower temperature than water, around 173 degrees, so as long as you cook your food at a temperature higher than that, you are safe.  But, be warned.  Alcohol and gas cook tops are to be used cautiously.  Once the alcohol starts to boil out, it doesn't take much to ignite it.  So, always have a lid ready to put on the pan to extinguish the fire, should their be one.  This is another good reason to keep you face away from you pots and pans, which is always a good idea anyway.  That is not to say that a pan with alcohol in it near an open flame will spontaneously flair up. Just be careful.  And, no, I am not going to instruct you on how to burn off the alcohol.  I'm just not going there for obvious reasons.

Vinegar

This can be used to brighten up most anything.  And when I say brighten up, I mean to complete the musical scale of the flavor you are looking for.  What's this crazy talk?  When you taste something, think of it like music.  There are high notes, mid range notes, and low notes.  You probably have already noticed that.  Basically, you want a balance of flavors and sometimes the mid or high range is lacking.  This is where acid comes in, whether it be citrus, or vinegar.  I really like sherry vinegar for this.  I like to use something around 6 percent acidity that is aged, because it is mellow and less harsh than other vinegars, thus brining something extra to the flavor.  I use this when I have something, for example, a cream sauce, that is flat and needs something to lift it up.  A small splash of sherry vinegar will usually fix that.  Any time you need some kind of acid to fix a flat flavored dish, consider vinegar.  It is definitely something you need to learn by experience, but I encourage you to try.

Fish Sauce and Anchovies

I will discuss these together because they function so similarly.  When used properly, this addition can fill out the flavors in a dish.  Thai cooking uses fish sauce a lot.  As with anchovies, when used properly, you can't tell they are in there, but you can tell if they aren't.  It can be used in mac and cheese, cream sauces, tomato sauces, you name it.  When used sparingly, it provides the much debated umami, or the fifth basic taste along with sweet, salty, sour, and bitter.  Think of it is that mid to low range flavor that is so prevalent in beef or mushrooms.  You can't put your finger on it, but it has a heartiness to it that fills your mouth.  I typically reserve anchovies for use in tomato sauces or red wine sauces because they are often times customary for those dishes.  However, I always have bottle of fish sauce handy for anything that needs it.  Again, if use properly, you won't know they are there, but you can over do it, so use sparingly.  You can always add more, but you can't take it out once it's in there.  Let's just call it "je ne sais quoi" in a bottle or tin.

A I had mentioned, I have more of these "secret weapons", and one that probably deserves honorable mention is sugar.  I typically use this for something that has a bit too much high range flavors in it, possibly in the case of over adjusting with acid.  Sugar helps cut the punch of the acid and bring things back into balance.  Again, use sparingly.  Enjoy food chemistry!